


On this page, we’ll guide you through the key points to consider when finalizing footage captured with motion control devices. We’ll also showcase examples to demonstrate the incredible level of perfection you can achieve when the process is done right.
Setting the Right Expectations
Motion control footage always requires a finalization step in post-production, and any footage shared or broadcast on professional platforms has already gone through this process. However, most manufacturers do not clearly communicate this requirement in their own resources, leaving inexperienced users unaware of this essential stage. As a result, this critical step is often overlooked, and discovering its necessity later on can lead to confusion.
But as the creators of this technology, it’s our responsibility to help users set the right expectations. We’re proud to lead with clarity. On this page, you’ll find examples showcasing a wide range of unfinalized shots (A)—alongside the stunning final results achieved after finalization (B).
Keep Vibrations in the Footage - Avoid Using IBIS
In-Body Image Stabilization (IBIS) only provides real-time correction and cannot distinguish between intentional camera movements and unintended micro-vibrations in motion control shots. As a result, it often interferes with the carefully programmed motion, leading to distorted or unusable footage. For this reason, all stabilization settings on your camera and lens must be disabled during motion control recordings.
You need to capture the micro-vibrations as they are, and handle the finalization entirely in post-production using dedicated software. This approach ensures full control and preserves the integrity of the motion you've designed.
The Tools You Need Are Already in Your Hands
There are many paid and free software options available for eliminating micro-vibrations. However, we’ve specifically tested the three most commonly used programs among our customers and confidently recommend them as reliable solutions:
• Adobe Premiere
• DaVinci Resolve
• Final Cut Pro
Adjusting the Camera Settings When Shooting
Using a shutter speed of 1/100 or faster significantly improves the effectiveness of finalization.
This becomes especially important when using DollyPLUS, as it records surface imperfections more directly. For complete peace of mind, you may need to increase your shutter speed at least 1/200 when shooting on extremely uneven or unstable surfaces.
Adjusting the Software Settings
When using the Stabilizer software, the default smoothness setting may sometimes be too aggressive. It doesn’t just reduce micro-vibrations—it can also unintentionally smooth out the intended camera movement. To achieve the desired result, you may need to reduce the stabilization amount. Lowering the smoothness value helps preserve the natural motion of the shot while still eliminating unwanted micro-shakes.
Finalizing After Speed Adjustments
If you intend to adjust the speed—especially to speed it up—we recommend applying finalization as the very last step, after the video has reached its final playback speed.
But aren’t video stabilization software tools really damaging to the footage?
This is a common concern, especially among filmmakers who’ve seen the artifacts and distortions that sometimes result from software stabilization. However, when it comes to motion control footage, this concern is largely misplaced—and here’s why.
The Nature of Motion Control Vibrations
Most people’s experience with stabilization software comes from correcting footage shot handheld or on gimbals. In these cases, the camera shake is primarily lateral—meaning the sensor physically shifts in space. This creates parallax issues and spatial inconsistencies between frames, which stabilization software struggles to fix without introducing visual artifacts. These can include:
- Perspective warping: as the software tries to align frames, it bends or stretches parts of the image unnaturally.
- “Jello” effects: caused by rolling shutter distortion during rapid shifts.
- Jump cuts or rubbery motion: when software fails to track a consistent anchor point.
These visual cues are unmistakably “stabilized,” and often detract from the viewer’s immersion.
Why Motion Control Footage Is Different
In contrast, the vibrations from a motion control system are angular, not lateral. The sensor isn’t shifting side-to-side; rather, the frame is rotating slightly around its center axis. These movements are incredibly subtle—micro-level shakes—and they do not introduce parallax distortion.
This is crucial. Angular movements can be digitally stabilized with near-perfect results because the stabilization software doesn’t have to guess or recreate any missing spatial information. There is no need to bend or distort the image. Instead, the software can simply re-align the frames rotationally, often requiring minimal or no cropping, and with zero visible degradation.
A Smarter Design Philosophy
This insight leads to a powerful design principle: instead of aiming to eliminate all vibrations through hardware—an approach that would significantly increase cost, weight, and complexity—we reduce vibrations just enough that software can clean them up effortlessly.
This strategy unlocks multiple advantages:
- Portability: Lighter, simpler devices that are easier to transport and deploy.
- Cost-efficiency: Lower manufacturing and purchase costs.
- Reliability: Fewer mechanical parts to tune and maintain.
- Creative flexibility: Freed from the need for bulky damping systems.
Changing Perception: From Patch to Superpower
Software stabilization’s bad reputation is rooted in its historical use on unsuitable footage. But motion control introduces a new context—one in which stabilization software doesn’t just work well; it excels. It’s not a workaround, it’s an opportunity to deliver stunningly smooth results that would otherwise be unattainable without prohibitively expensive hardware.
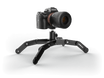
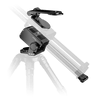
Because DollyPLUS moves directly on the ground, it can be affected by surface imperfections, resulting in larger-than-usual shocks in the raw footage. However, you’ll also see that these shocks are completely eliminated during the finalization process, making the setup usable on a wide range of flat surfaces.
What’s the Point of Motion Control If I’ll Just Fix It in Post?
This is a common question, especially from those who are new to motion-controlled cinematography and still exploring how it truly differs from traditional tools.
Stabilization is a corrective measure. It’s designed to clean up unintentional imperfections—shakes, bumps, or micro-vibrations typically found in handheld or gimbal shots. It’s a way to salvage motion, not to create it.
Motion control, by contrast, is about designing the movement from the ground up. It enables you to choreograph smooth, precise, and intentional camera paths that don’t just follow the subject—they help tell the story. Timing, pacing, and spatial consistency become part of the creative language, allowing the camera to move with purpose rather than improvisation. That kind of cinematic clarity simply can’t be recreated in post.
Even if you apply a touch of stabilization to polish the result—perhaps to eliminate micro-shakes from the floor or tripod—you’re starting with a solid foundation built by motion control: one that is mechanically precise and narratively deliberate. It’s the difference between enhancing a great shot and trying to fix a flawed one.
So no—motion control isn’t made obsolete by stabilization. If anything, stabilization is most effective because motion control has already done the heavy lifting. These tools are not rivals; they’re partners—each playing a role in crafting visuals that truly captivate.
Overengineering Isn’t the Answer—Efficiency Is
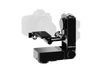
Any system that shifts the camera’s center of gravity will inevitably introduce micro-vibrations. Attempting to eliminate these vibrations entirely at the hardware level would significantly increase both the size and cost of the equipment, making such solutions impractical and inaccessible.
Any system that appears to produce perfectly smooth footage without any post-production is almost certainly relying on some form of internal image processing. Therefore, for motion control systems that allow users to mount their own cameras, this final stage is best handled not internally through IBIS, but through post-production.
At edelkrone, we lead the world in this category—our motion control products deliver the best results for a successful finalization, offering unmatched motion quality.